Auto Attendants can be very useful in helping to route incoming calls to an organisation. If you have a very busy reception an auto attendant can help restore some sanity and allow them to give personal attention to those people that need it instead of just routing calls all day.
It would probably be useful to have different auto attendants set up at different times of the day. At the very least you would probably want an office hours auto attendant and one for out of hours service where you might simply offer callers the option to leave a voicemail. And you could route the voicemails to separate departments rather than just collecting them all in one main voicemail box.
Don’t just restrict the auto attendant to the front door of the organisation. It can also be used in other areas where you might have external callers dial a number and then want to give them options of who they want to speak to or even get put through to a voicemail or hear a recorded message.
Now we’ve considered the benefits of an auto attendant let’s get down to the business of how to configure it on the Avaya IP Office 500 system.
There are four elements to setting up an Auto Attendant
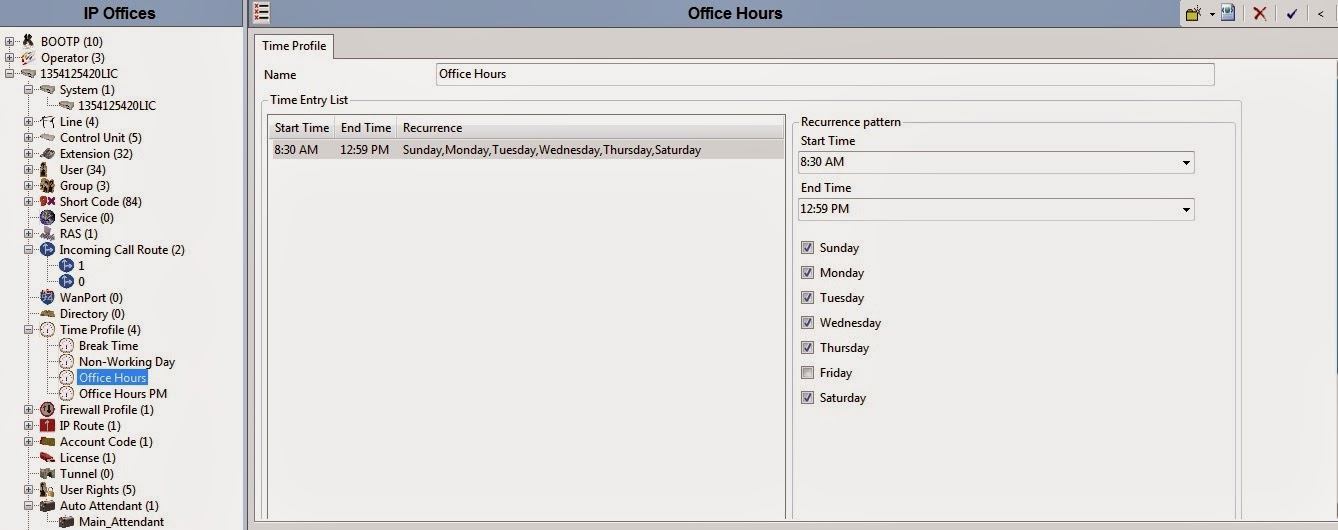
1). Time Profile, Right click the Time Profile > select New > Then set the time according the required time settings
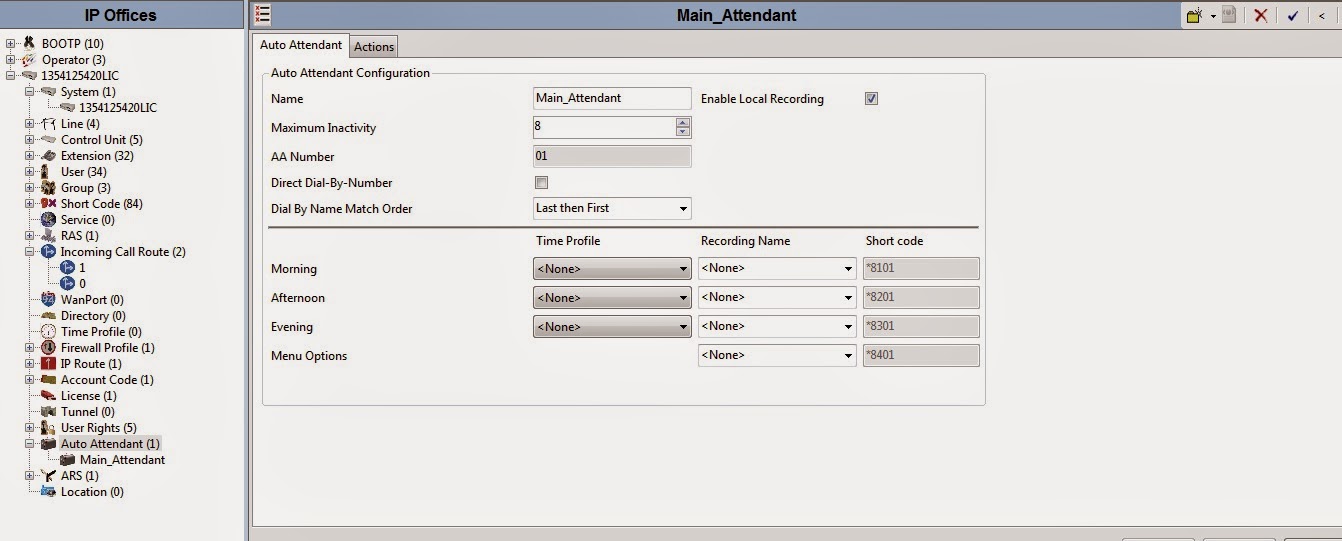
2). Auto Attendant, Right click the Auto Attendant > select New > then configure the new Auto Attendant, at the name field you can put any name you want' example; Main_Attendant. At the Time Profile field you can keep it as it is otherwise fill-in the blank base on your time profile settings. Keep the other field in the Auto Attendant configuration with its default settings.
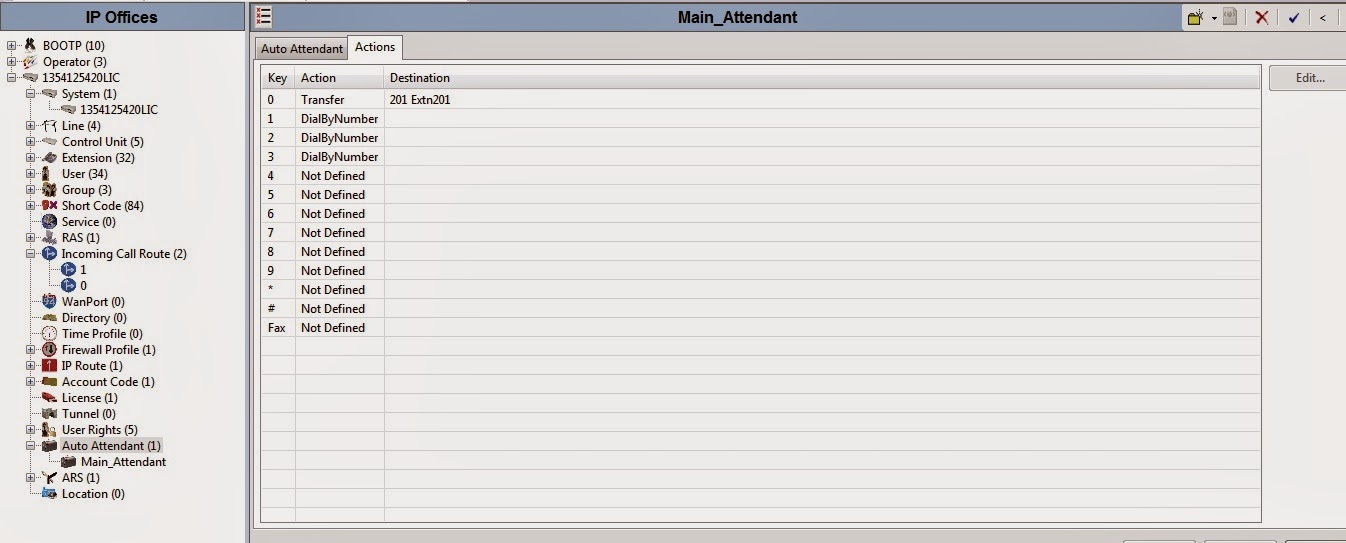
Set the actions base on your numbering plan, the key 0 would be for the operator extension and the action is transfer, the key 1 is for 100 series extension, the key 2 is for 200 series extension, the key 3 is for 300 series extension and so on, and you have to set the action with DialByNumber
3). Message Recording, On your Avaya Deskphone dial the feature code that you could see in the Auto Attendant configuration field. if you dont set the time profile just use the *8401 and then start the recording of message after the short tone.
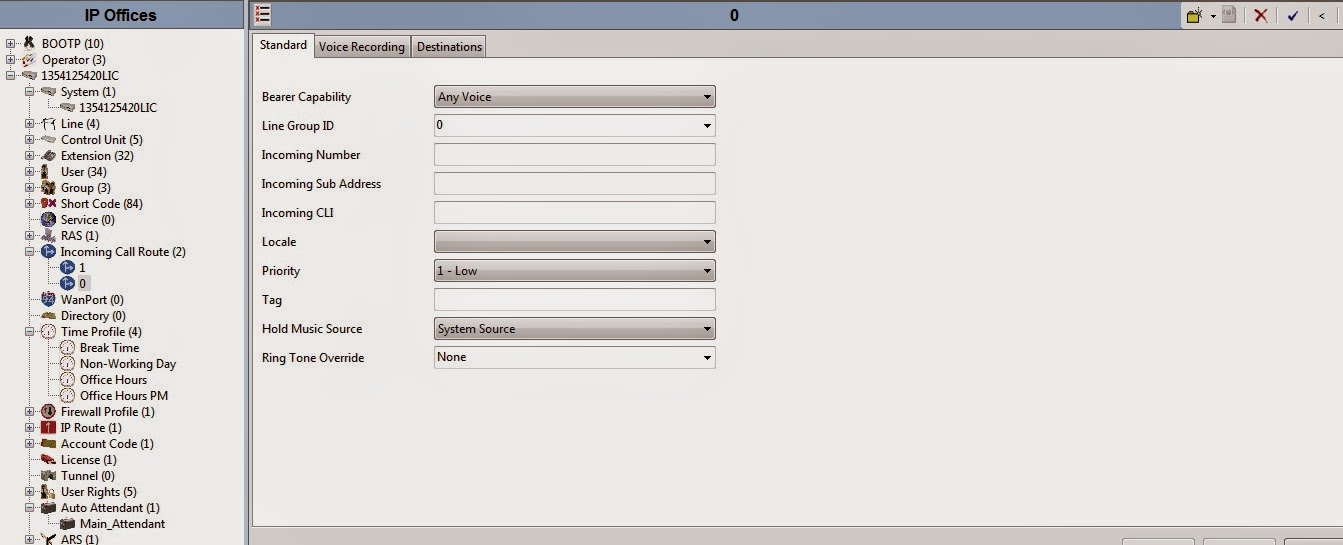
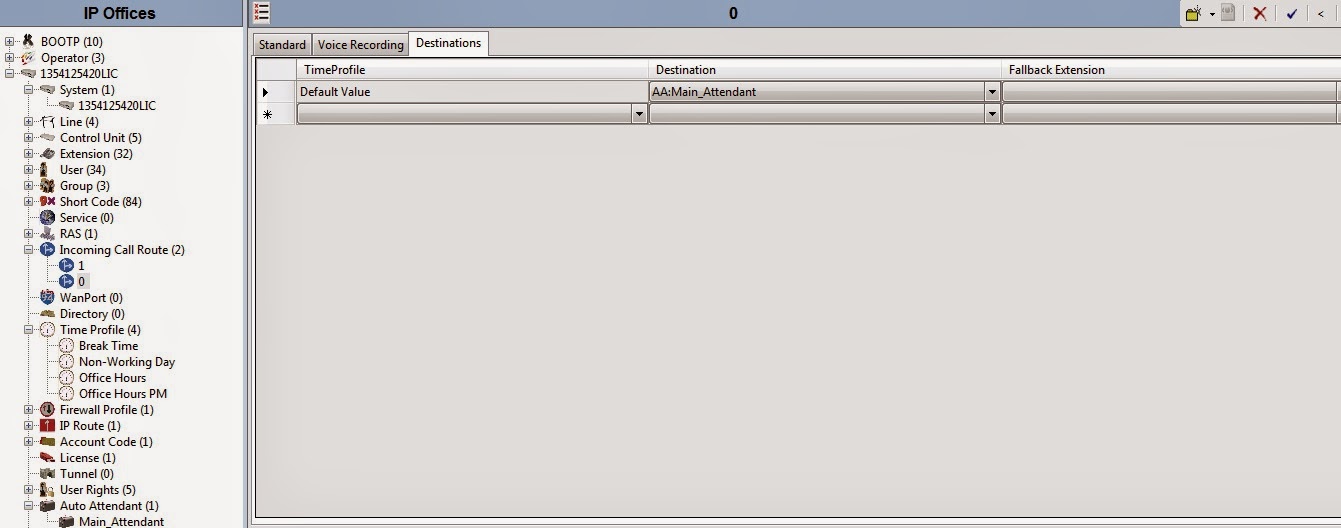
4). Incoming Call Route, this is the last part of Auto Attendant administration at the line group ID just make sure that you have set ID base on the incoming ID in Line settings. Keep other default settings in standard field, At the Destinations field select the AA:Main_Attendant at the drop down menu.

Post a Comment